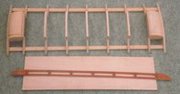
ROOF CEILINGS
After my first model, I needed to find a way of building a roof that was rigid enough to be removed for display but without a load of unsightly supports that do not exist on a real wagon.
Using wood is very difficult without the addition of formers because a 1/12th scale roof is very thin so I started to experiment using sheet aluminium. I used some from a local scrap yard, about 2mm thick. I made a plywood template for the correct curve of the roof and (for a small donation to their tea club) I asked a metal fabrication shop to put the curves into two pieces of metal for me. (more)
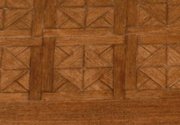
FLOORS
Generally speaking, the floors are simply made from floorboards and covered in lino.
When building the model, there are options of making your own planks, buying 1/12th scale sheets of paper with the floors printed on them or not bother at all if the floor is going to be covered with lino or carpet.
I used the paper option on my first model but it is not good enough to fool anyone into thinking that it is real wood. (more)
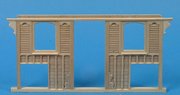
WALLS
I have used several different methods for constructing the walls of the models.
For the 1930s road wagon, I followed the instructions that came with the MFD plans.
For a start I had never made a wagon before so I had no idea of the best way of going about it. The walls are made up on a set of formers with an inner and outer skin in much the same way as model aircraft wings are built. It looked fine when it was completed and you can conceal wiring between the layers, which can be useful. (more)
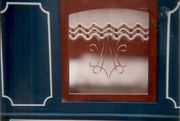
WINDOWS
In my opinion the ornate glass windows and mirrors are some of the most important features of a showman’s wagon. Leave the glass plain and you have a model devoid of any character.
As soon as I set foot in a wagon for the very first time, I started to think about ways of reproducing glass that would look right in 1/12th scale. (more)
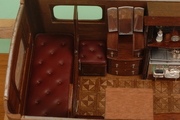
UPHOLSTERY
The materials that I use are: A piece of softwood (jelutong) for the base; fairly thin brass pins; double sided sticky tape; PVA glue or impact adhesive; very thin soft leather; foam rubber; paint (to match the leather); dress making pins or similar.
Most of the upholstery that I make is for built in furniture so it is important to get the size right. (more)
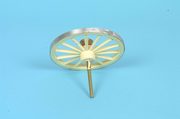
WHEELS
I will start with pneumatics because they were on the first model that I made from the MFD plans. I simply bought a set of four wheels the right size from a Model Aircraft shop. I used them exactly as they were except for the addition of a set of hubcaps. At the time, I thought that they looked OK but to be honest, I didn’t really know what the real size ones should be like. It is one of those things that I look at from time to time and think, I must change them for something better but never find the time to actually do it. The hubcaps look fine when I polish them up as they are made from solid silver dome shaped earrings. (more)