 After my first model, I needed to find a way of building a roof that was rigid enough to be removed for display but without a load of unsightly supports that do not exist on a real wagon.
| Roof/Ceilings |
| Floors |
| Walls |
| Windows |
| Upholstery |
| Wheels |
After my first model, I needed to find a way of building a roof that was rigid enough to be removed for display but without a load of unsightly supports that do not exist on a real wagon.
Using wood is very difficult without the addition of formers because a 1/12th scale roof is very thin so I started to experiment using sheet aluminium. I used some from a local scrap yard, about 2mm thick. I made a plywood template for the correct curve of the roof and (for a small donation to their tea club) I asked a metal fabrication shop to put the curves into two pieces of metal for me. I cut them both to the right size and removed a rectangular section from the centre of the larger of the two pieces with a hand jigsaw. Depending on the type of ceiling, I then either apply veneer using an impact adhesive or 0.4mm ply if it is to be a painted ceiling. Any wooden carvings, panels etc. can be added using a wood working glue, for other materials I use epoxy resin. I paint panels individually on 0.4mm ply and stick them one at a time on to the ceiling, rather than paint the ceiling in situ. This is so much easier if I muck up the paintings.
If the exterior roof should be covered in canvas, I use very fine white cotton material and stick it to the aluminium using a clear satin varnish. I rough up the aluminium slightly, then give it a generous coat of varnish, lay the cotton on and smooth it out with a brush using more varnish over the material. When it is completely dry, I trim off the surplus cotton with a scalpel. A coat of white satin paint gives the right finish. I shape the ends of the Mollycroft from solid Jelutong and paint them to match. top
Generally speaking, the floors are simply made from floorboards and covered in lino.
When building the model, there are options of making your own planks, buying 1/12th scale sheets of paper with the floors printed on them or not bother at all if the floor is going to be covered with lino or carpet.
I used the paper option on my first model but it is not good enough to fool anyone into thinking that it is real wood.
I went totally the other way with my second model making the whole floor from individually cut planks from 0.8mm ply and laying them at random to show the grain to its best effect, only to find that the whole floor should be covered in lino. What you might call a lack of forward planning. You can buy sheets of paper with lino patterns printed on them and with 2 or 3 coats of satin varnish, they look very good.
The Eccles wagon was a whole new ball game to me as it had a very nice parquet wood block floor. I took photos and measurements of the original and set to work.The floor consisted of a large panel measuring 10ft x 3ft made up of 30 smaller panels 1foot square. Each of these small panels comprises of 16 segments making a total of 480 individual pieces to make the complete floor. The bulk of the tiny segments are triangular in shape which means that the corners are very prone to breaking off when you are cutting the pieces to make them in 1/12th scale. The floor in the full size wagon is made of medium coloured Oak but I decided to make mine of 1/32inch Birch ply and stain it.
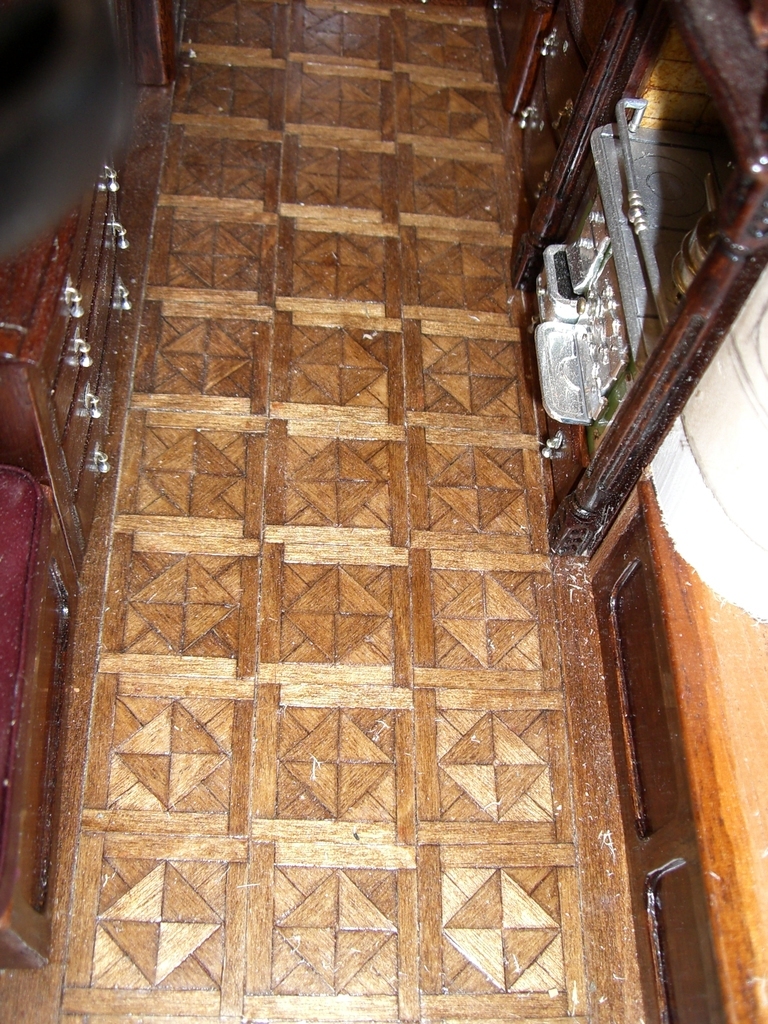 Cutting the small pieces turned out to be more difficult than I had expected, even using a brand new scalpel blade, most of the corners broke off from the triangular pieces. More in desperation than hope, I tried a dress makers cutting wheel and whilst I had to press fairly hard it made a nice clean cut with corners intact 90% of the time so I was able to start building the floor, or so I hoped. After a few more scrapped experiments I finally decided to accurately mark out the complete panel of 30 one inch squares on a single piece of 1/32nd inch ply and glue the segments straight onto it. This way I could check as I went that the overall size was correct. You can see from the photo that each square is framed by 4 small pieces of rectangular wood, so I did all of them first leaving the centres to be filled with 12 small triangular pieces in each square. It was a bit like a jigsaw puzzle trying to find bits with the grain running in the right direction. If a bit was too small, I would discard it and if it was too big, I would shave a slither off until it fitted. The end result was well worth the effort in my opinion. You can solve any problem if you have a big enough waste bin! top
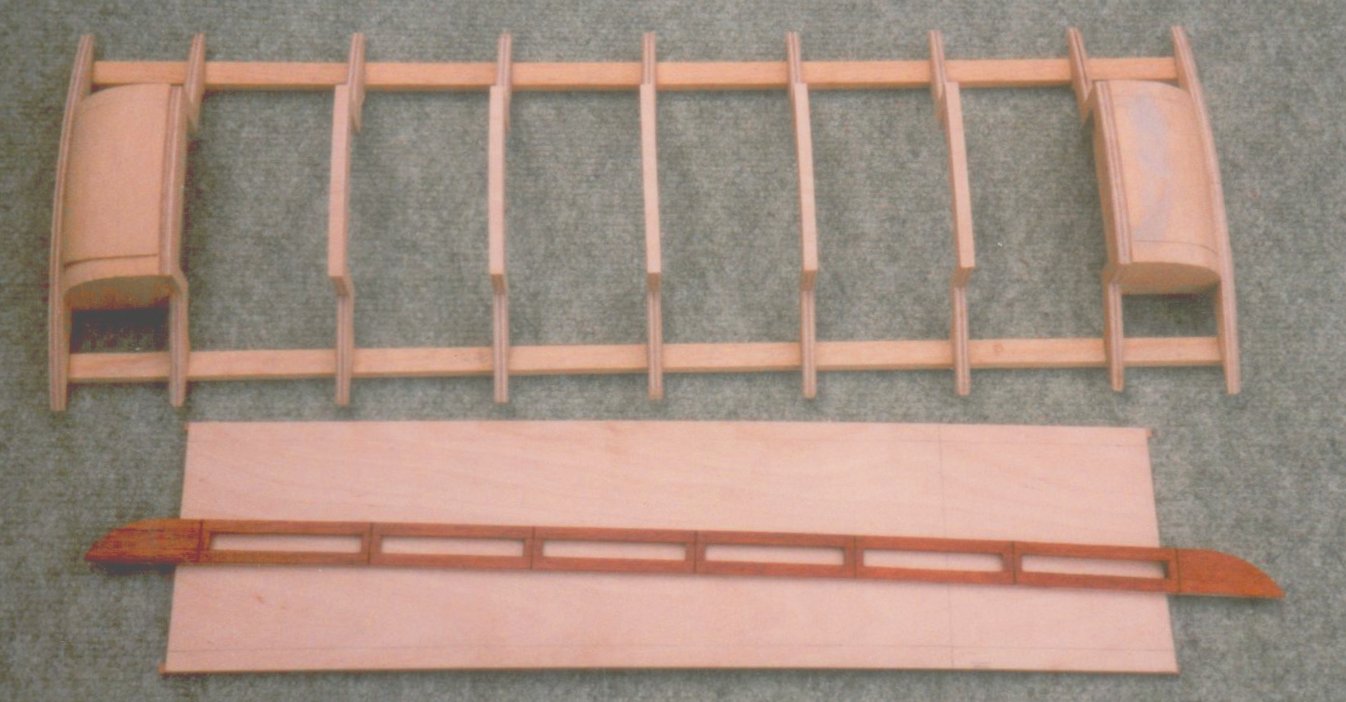
I have used several different methods for constructing the walls of the models.
For the 1930s road wagon, I followed the instructions that came with the MFD plans.
For a start I had never made a wagon before so I had no idea of the best way of going about it. The walls are made up on a set of formers with an inner and outer skin in much the same way as model aircraft wings are built. It looked fine when it was completed and you can conceal wiring between the layers, which can be useful.
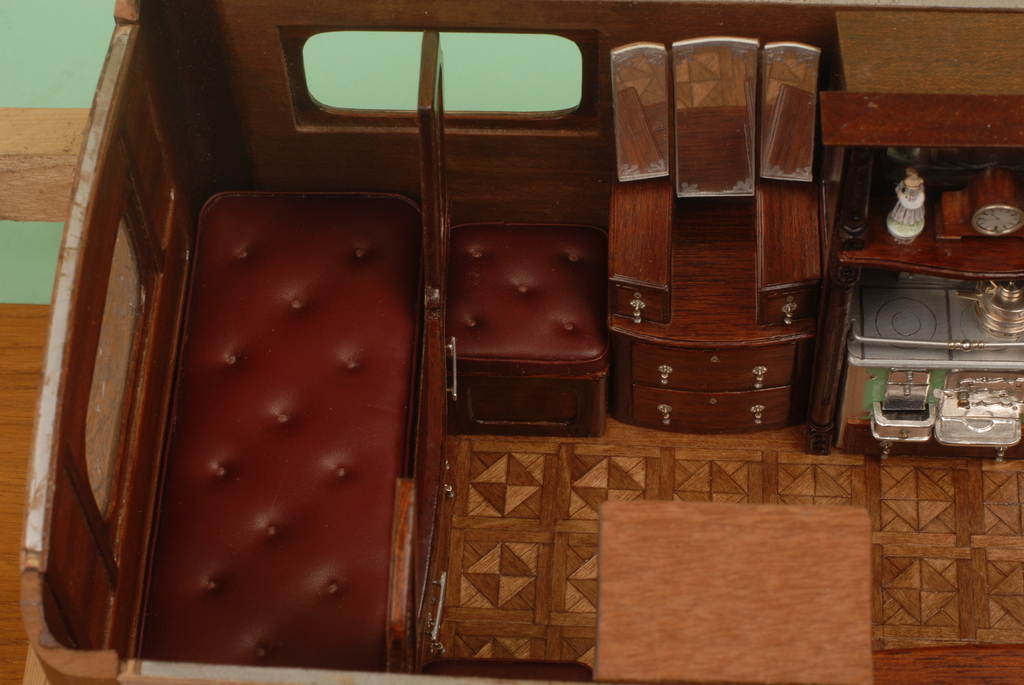
For the Orton, I used another method. I used 1/8th inch ply and veneered the inside walls with Mahogany. The outside was left plain except for all of the panelling, which was outlined with 1/32nd inch ply. The inside walls were marked up for the panels and they were outlined in 1/32nd inch thick Mahogany. All of the furniture was made before any of the walls were glued in place. With this model, there were two internal partition walls one with a full size door into the bedroom and the other had sliding mirrored doors into a child's sleeping area. These were both completed before fixing into place. These partition walls did help to make the overall structure more rigid.
All of the pieces that made up the interior were completed and varnished before being glued into position. I tried to make sure that any areas which I knew were going to be glued, were left clear of varnish to make the glue adhere better.
The bedroom had many paintings on the walls and I painted each picture individually on 1/64th inch ply and glued them into place before fixing the walls in position.
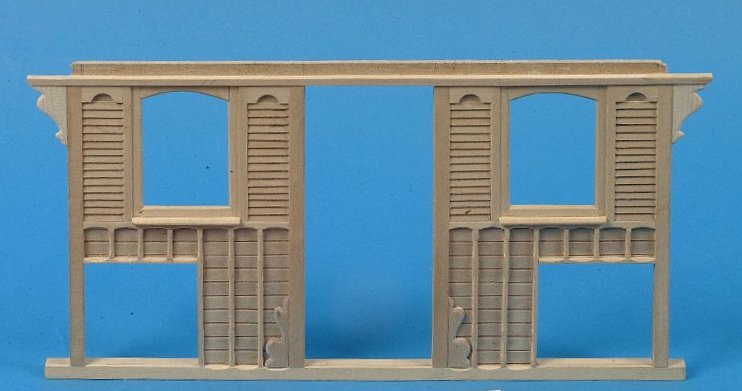
The Tube Shooter was made in much the same way as the Orton except for the outside walls, which were boarded, and I think that the Photo is self-explanatory.
I had a problem with the walls of Eccles becoming bowed. I used 3mm MDF with Mahogany veneer glued to the inside and 0.4mm ply glued to the outside and I am sure that using two different materials on such a thin piece of MDF caused the distortion. I overcame the problem by using 3mm aluminium instead of MDF and used an impact adhesive to attach the ply and the veneer. Once the ply and veneer were in place, I was then able to use wood glue to attach wooden items. I have used this method for making doors (with thinner aluminium) and it has worked very well.top

Section still under Construction. top
Section still under Construction. top

Section still under Construction. top